Installation
Guide

Easy Installation - Glass Fixing


Step 1

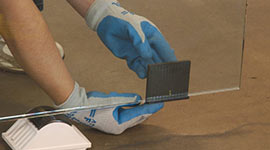
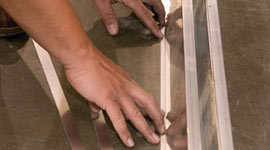
Step 1 - Adhere the L-Setting Blocks to the bottom of the glass panel.

Step 2

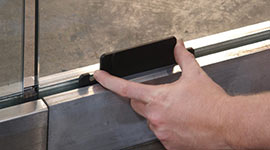
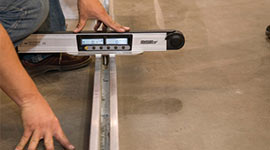
Step 2 - Insert the Taper set half way down into the Base Shoe as shown, opposite the L-Setting Block, and then squeeze the Tapers together finger tight.

Step 3

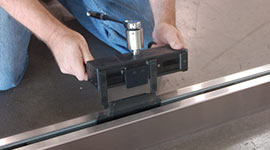
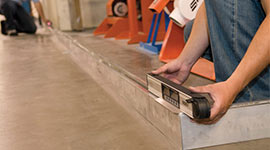
Step 3 - Place Installation/Removal Tool into position onto the Tapers and push them down into the Base Shoe.

Step 4

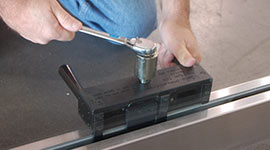
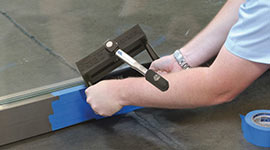
Step 4 - Crank the Torque Wrench until the wrench clicks and breaks for a few degrees, letting you know the Tapers are locked to the correct measured torque.

Test Rig

In addition to tests for building code requirements BS 6180:2011, CEBTP (France) and AbZ (Germany) CRL has the capability to undertake specific balustrade loading tests using their in-house test rig.


Complete Balustrade Installation - Step-by-step Guide


Step 1

Step 1 - Align the PAL Tool with Base Shoe and point toward the Laser Target set at other end of Base Shoe to follow the grade.

Step 2

Step 2 - Use the PAL Tool to ensure the Base Shoe is vertically plumb at all points

Step 3

Step 3 - Slide Shim Strips under Base Shoe to fill gaps before fastening.

Step 4

Step 4 - Adhere the L-Setting Blocks to the bottom of the glass panel.

Step 5

Step 5 - Insert the Taper set half way down into the Base Shoe as shown, opposite the L-Setting Block, and then squeeze the Tapers together finger tight.

Step 6

Step 6 - Place Installation/Removal Tool into position onto the Tapers and push them down into the Base Shoe.

Step 7

Step 7 - Crank the Torque Wrench until the wrench clicks and breaks for a few degrees, letting you know the Tapers are locked to the correct measured torque.

Removal

Removal - Glass panels are just as easy to remove. Simply mask off the cladding with tape. Reverse the torque setting on the Installation/Removal Tool and apply force to open the Tapers.